Features
Bonds in a Wet Field
- No primer or adhesive is required
- Simple cementation technique
Sustained Fluoride Release
Smooth, Creamy Consistency
Low Film Thickness
- Restorations’ seat is better; has fewer problems
Strong Direct Bond
- Non-precious and precious metal to tooth structure
Superior Marginal Seal
- Minimizes microleakage
- Coefficient of thermal expansion is similar to tooth structure
Low Solubility After Set (.06%)
- Reduced microleakage
- Less chance of washouts and sensitivity developing
- Faster “Snap Set” with more working time
Strong Bonding, Compressive and Tensile Strengths
- Greater longevity and restoration integrity
Description
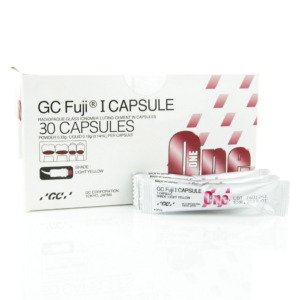
Radiopaque Glass Ionomer Luting Cement in Capsule
Chemically cured strontium based glass ionomer cement ideal for basic luting of metal based restorations in the convenient capsule delivery.
COMPOSITION
polybasic carboxylic acid**-10-20%
INDICATIONS
- Cementation of metal-based inlays, onlays, crowns, bridges and posts
- Cementation of high strength (zirconia based) all ceramic crowns and bridges
Specifications
TECHNICAL DATA:
- Powder / Liquid ratio (g/g) :0.33/0.18
- Mixing time (sec.):10 secs
- Working time (min., sec.) (at 23 °C) (from start of mixing):2 mins 15secs
- Final finishing commencing time (after seating the restoration):4 mins 30 secs
CONTRAINDICATIONS
- Pulp capping
- In rare cases the product may cause sensitivity in some people. If any such reactions are experienced, discontinue the use of the product and refer to a physician.
STORAGE
Recommended for optimal performance, store in a cool and dark place (4-25°C) (39.2-77.0°F).
Shelf life : 3 years from date of manufacture
Directions For Use
1. TOOTH PREPARATION
a) Prepare tooth in usual manner. For pulp capping, use calcium hydroxide
b) Clean the prepared teeth with pumice and water
c) Rinse thoroughly with water. Remove excess moisture by blotting with a cotton pellet or gently blowing with an oil-free air
DO NOT DESICCATE. Prepared surfaces should appear moist (glistening)
2. RESTORATION PREPARATION
Make sure that the restoration is pretreated and handled according to the manufacturer’s instructions
3. CAPSULE ACTIVATION AND MIXING
a) Before activation, shake the capsule or tap its side on a hard surface to loosen the powder
b) To activate the capsule push the plunger until it is flush with the main body
c) Immediately place the capsule into a GC CAPSULE APPLIER and click the lever once
The capsule is now activated
Note : The capsule should be activated just before mixing and used immediately
d) Immediately remove the capsule and set it into a mixer (or an amalgamator) and mix for 10 seconds (+/-4,000 RPM)
Note: When using a rotational mixing device, it is recommended not to use the centrifuge option
4. DISPENSING
a) Immediately remove the mixed capsule from the mixer and load it into the GC CAPSULE APPLIER
b) Make two clicks to prime the capsule
To adjust the direction of the nozzle, hold the applier with the capsule towards you and turn the capsule body
c) Extrude directly into the restoration
d) To remove the used capsule, push the applier release button. Twist the capsule and pull upwards
5. CEMENTATION
a) Coat the internal surface of the restoration with sufficient cement and seat immediately. The working time is 2 minutes 15 seconds from start of mixing at 23°C (73.4°F). Higher temperatures will shorten working time
b) Maintain moderate pressure
c) Start removing excess cement when the excess cement feels rubbery. d) Finishing can be started 4 minutes 30 seconds after seating the restoration.
